Pre-Requisites
- Okta tenant needs to be OIE and not classic
- Okta tenant should have device integrations feature enabled
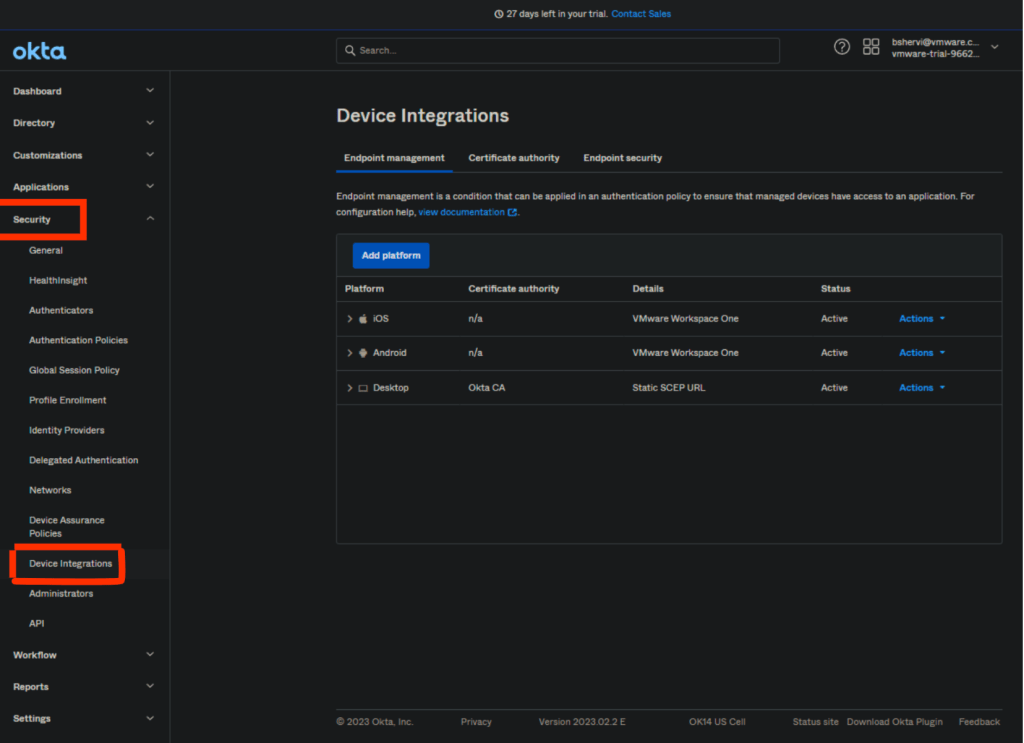
You can find the Device Integrations under security —> Device Integrations
Procedure to configure Okta OIE Device Trust with Workspace ONE MDM.
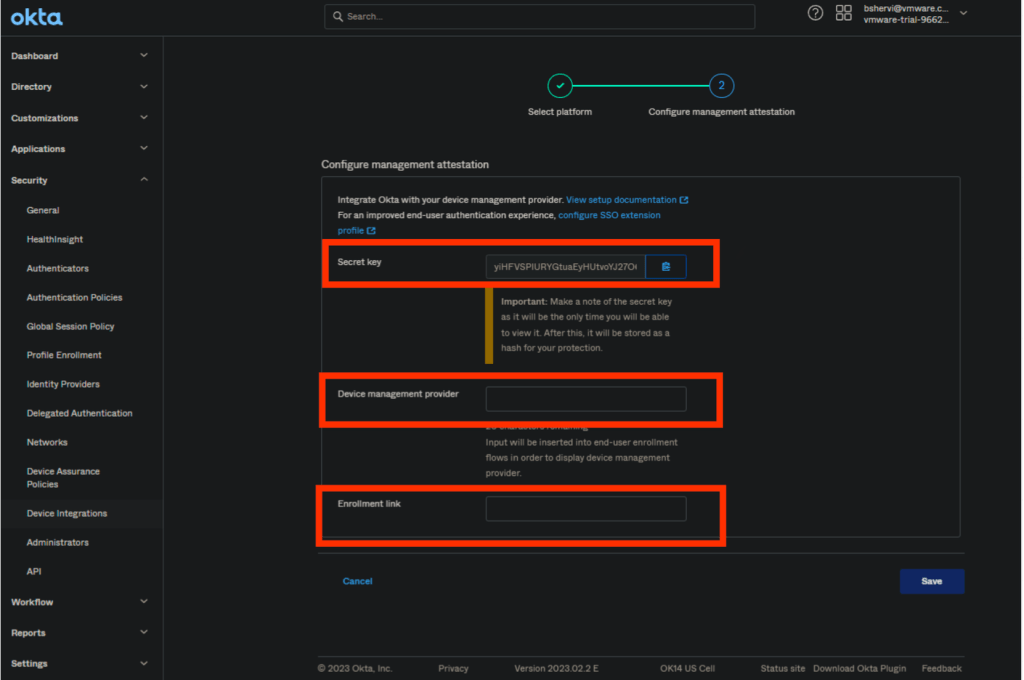
In Okta Admin Console, specify a mobile device platform (Workspace ONE UEM) and generate a secret key that you’ll enter in your Workspace ONE UEM “Okta Verify” managed app configuration. The key allows Okta to determine the management status of your targeted Android and iOS devices during app access.
To configure this follow the below steps
1. In the Okta Admin Console, go to Security > Device integrations
2. Click the Endpoint management tab.
3. Click Add platform
4. Select Android or iOS as applicable and click Next
5. Copy the provided Secret key to your clipboard by clicking the copy icon adjacent to the field and save it for further configuration
6. In the Device management provider field , enter the MDM as “Workspace One UEM”
7. In the enrollment link field, provide the enrollment link or the link to enrollment instructions
8. Click Save
Use Workspace ONE UEM to deliver the Okta Verify to iOS and Android devices. We will supply the Okta Org URL and Key-Value Pair using the managed app configuration.
Procedure to configure Okta Verify using Workspace ONE UEM
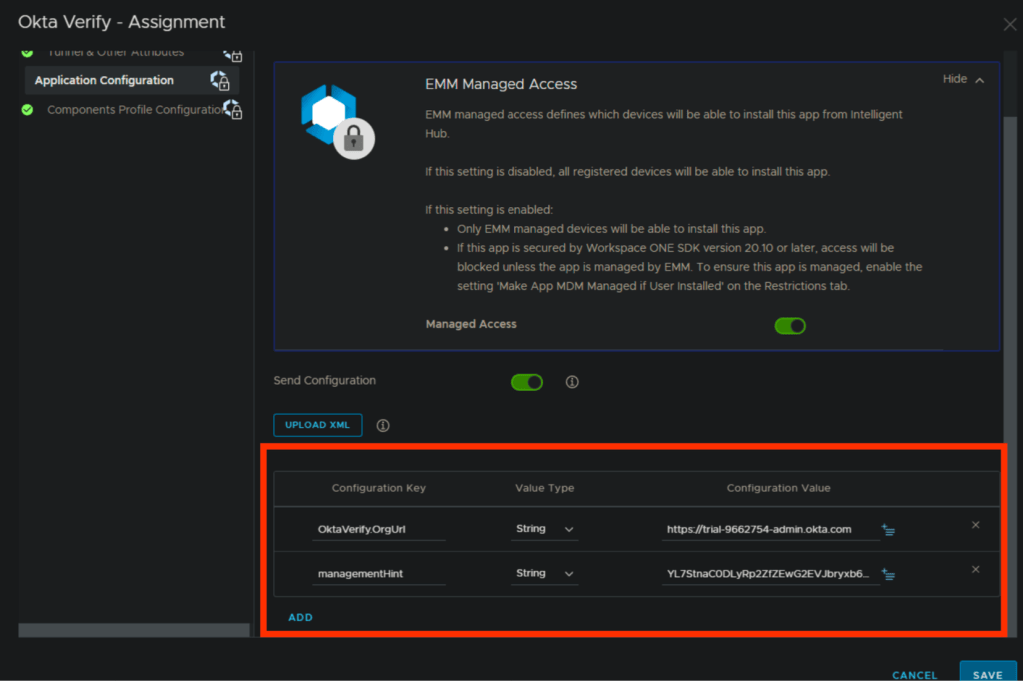
1. Add Okta App to Apps and Books wither via Public or VPP. In the assignment page for the okta verify application, you need to two config keys.
Okta org URL — “OktaVerify.OrgUrl”
Key-Value pair — “managementHint”
2. Below is screenshot for the iOS okta Verify app configuration for reference.
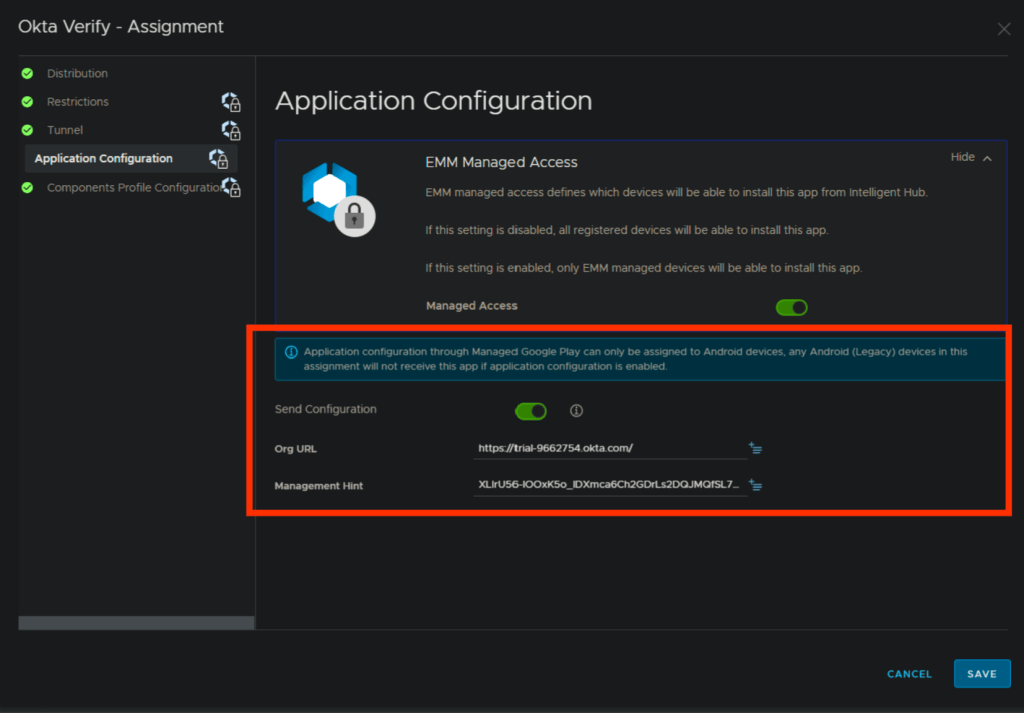
3. Below is screenshot for the Android okta Verify app configuration for reference.
Now, we need to create an authentication policy to allow only the managed devices to access the corporate SaaS applications and deny access to unmanaged devices.
Procedure to create an Authentication Policy
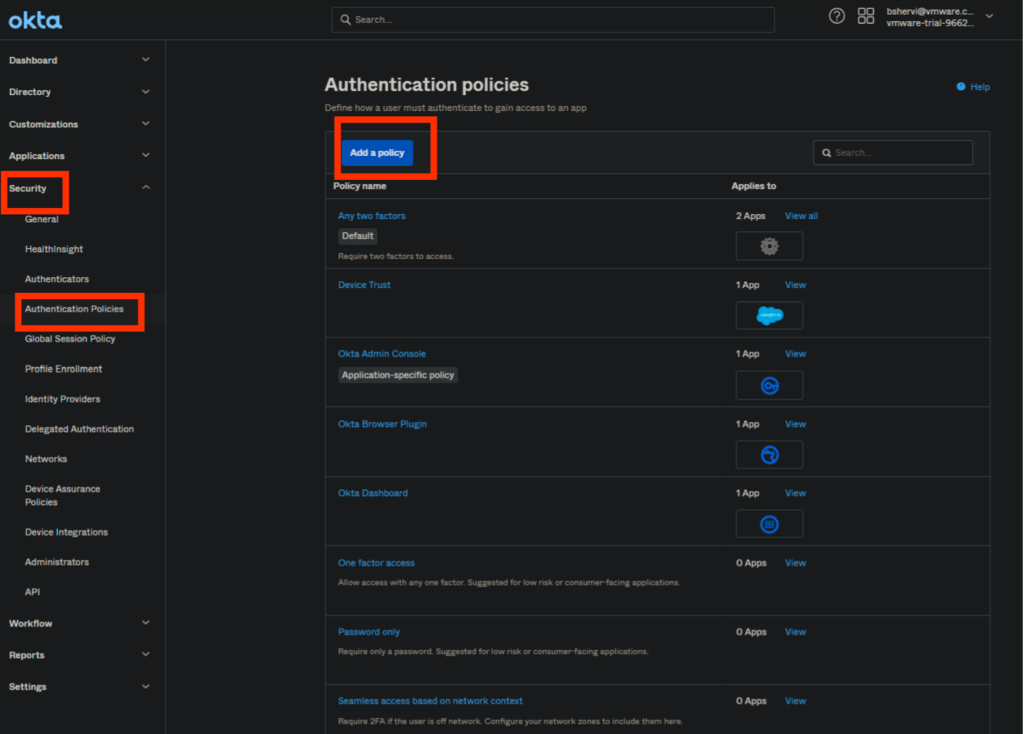
1 In the Admin Console, go to Security> Authentication Policies and click on Add Policy.
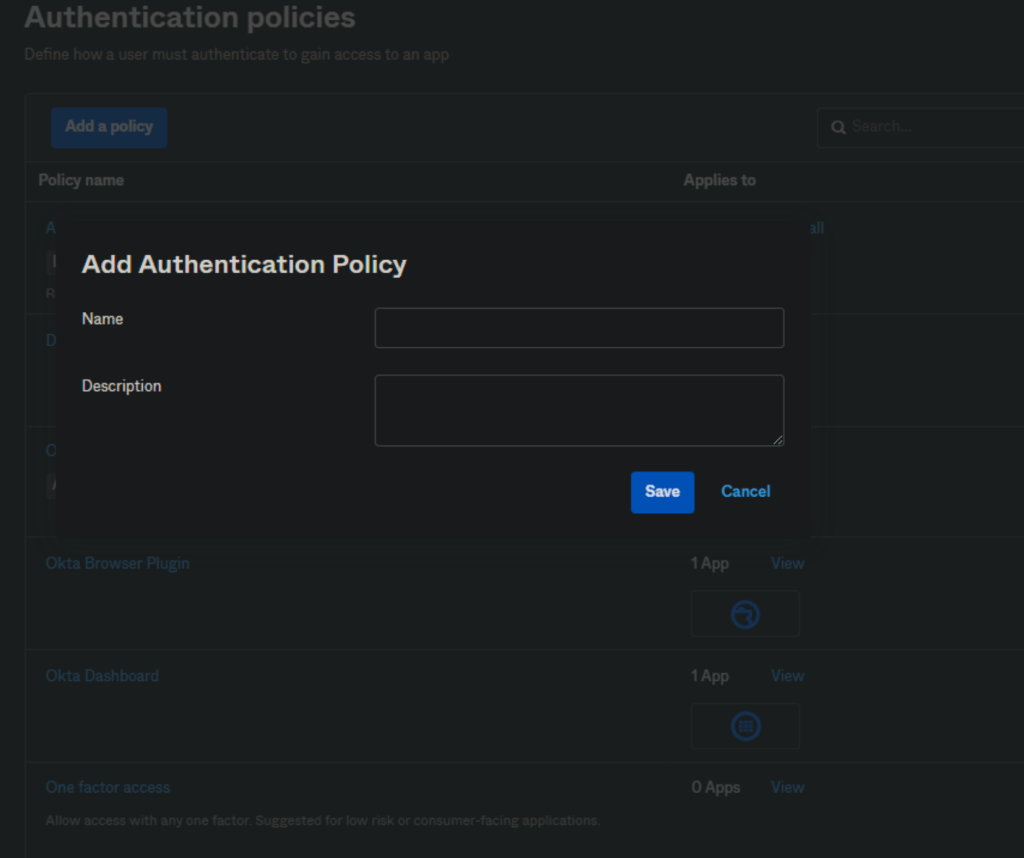
2. New policy pop-up will appear and provide a name and description as per requirement.
3. Once you add the policy, click on it from the list and click on Add Rule and configure as per below screenshot.
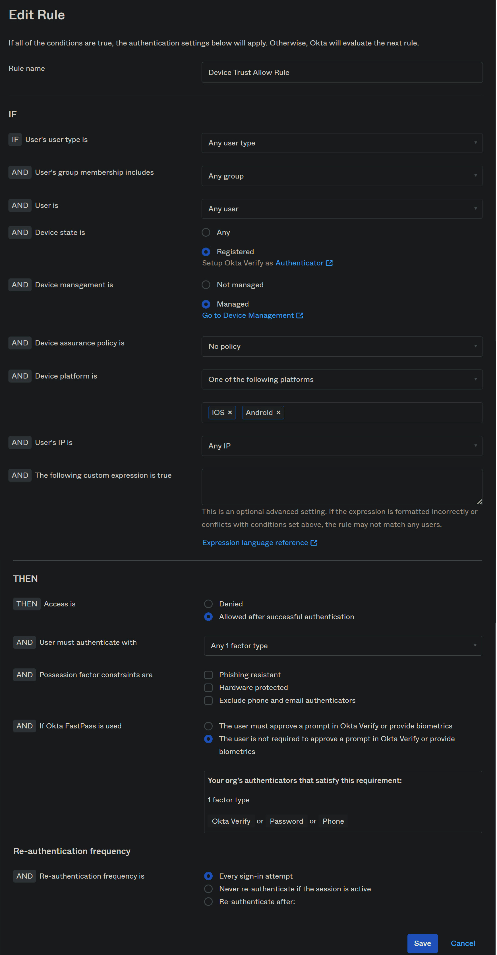
The above rule explains —> If the request is coming from any user from device types iOS and Android and if the device is registered and managed, allow the device to access the applications.
Note: The “User must authenticate with” can be “Password” or “Any 1 factor type”. But this totally depends on the customer requirement.
4. To prevent access to applications on unmanaged devices, you must set another rule. For comparison, see the screenshot below. This deny rule should be below the allow rule.
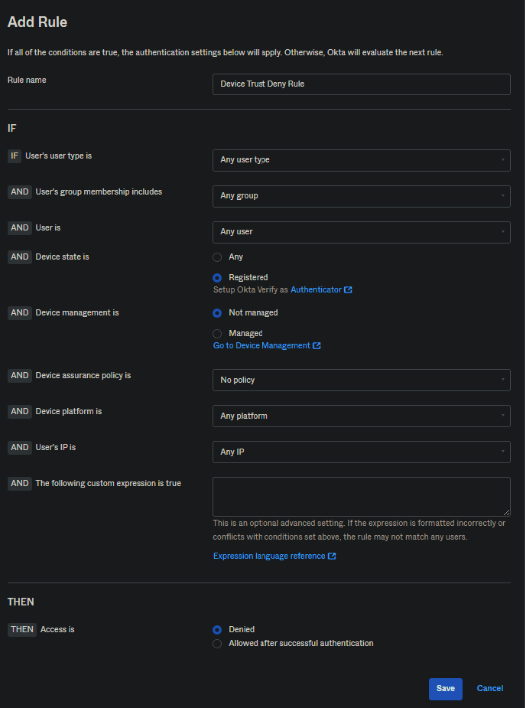
Note: When you create a new Authentication Policy and Add Rule, a default rule will be created and it’s called “ Catch-all Rule”.
5. Now, go to Authentication policies and select the policy which you created or the policy which is being used for Device Trust. Then, click on Applications and click on Add app which you want test device trust with.
End-User experience on managed iOS devices (Video)
End-User experience on unmanaged iOS devices (Video)
Author: Bahubali Shervi, Consultant at VMware Software India Pvt Ltd
